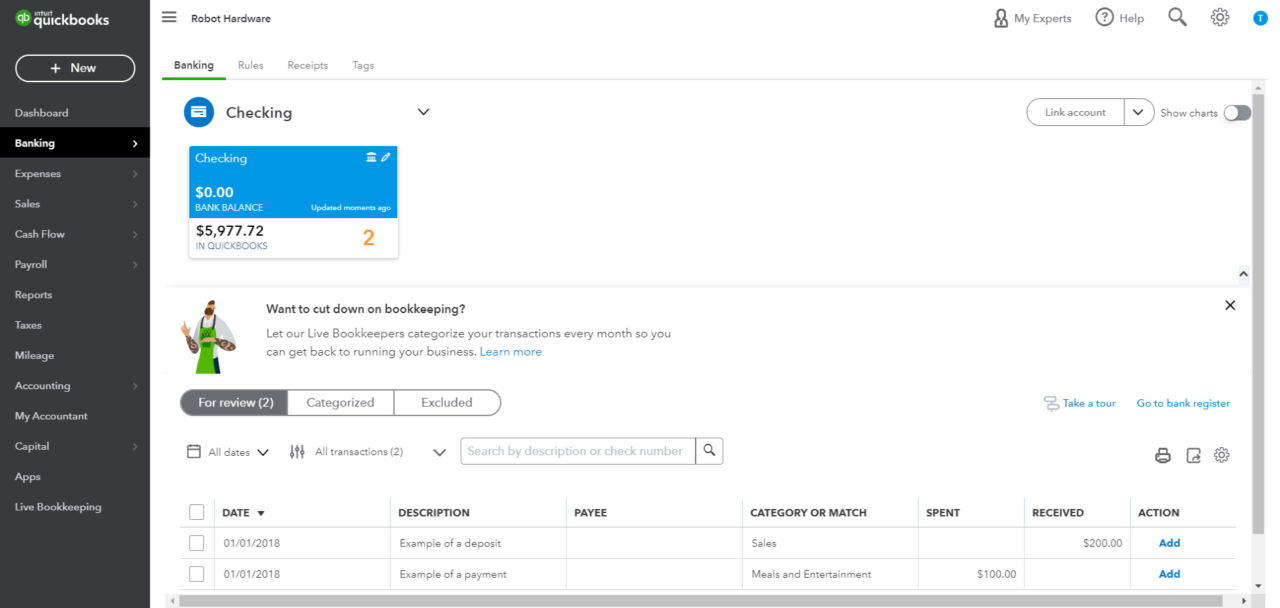
QuickBooks Online allows you to download your banking transactions into QuickBooks. This will allow you to avoid the manual input of each transaction.
There are two ways to import your transactional data into QuickBooks Online – through a direct electronic connection with your bank account, and by manually uploading a CSV file of transactions downloaded from your bank account.
Option One: Importing Bank Transactions via a Direct Connection
Online Banking is one of QuickBooks Online’s most helpful and time-saving features. When you electronically connect a bank account to QuickBooks Online, the application automatically downloads and categorizes bank transactions for you. You will need to check with your financial institution to see if this service is available, and if so, whether there is an additional fee.
Step 1: Select Your Bank from Directory of Eligible Banks
From the left navigation menu, go to Transactions > Banking (depending on the version, the navigation may also be Banking > Banking).
If you are linking a bank account for the first time, your will be presented with a page highlighting the benefits of the connection. To proceed with setting up the direct connection, press the green ‘Connect Account’ button to continue (see first image below).
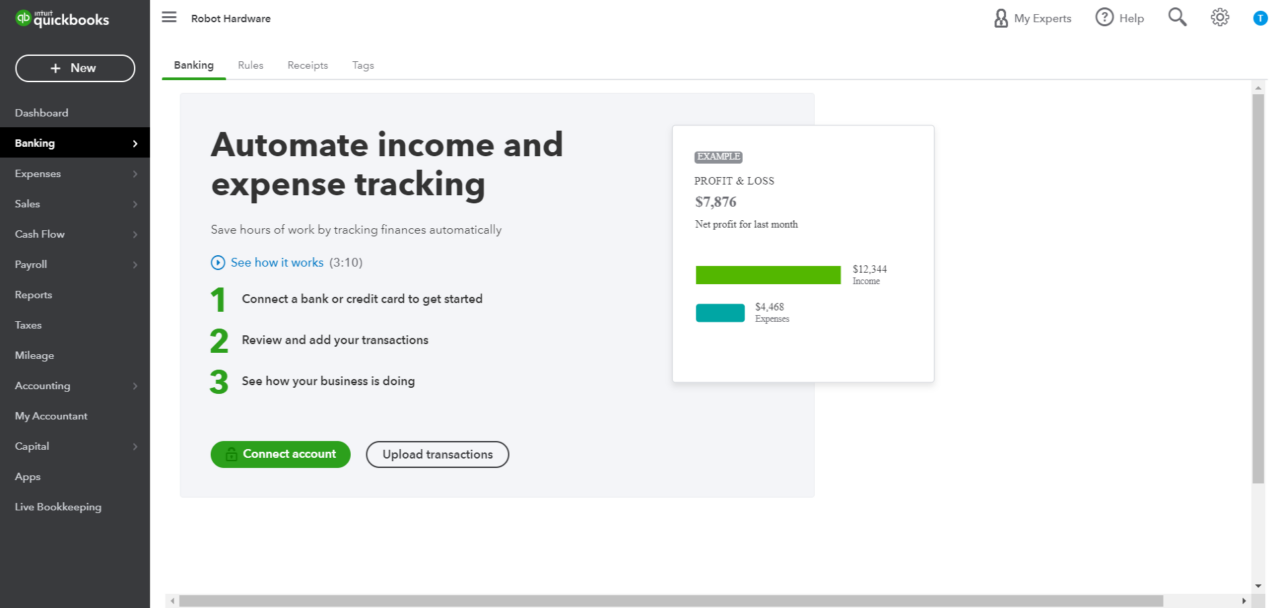
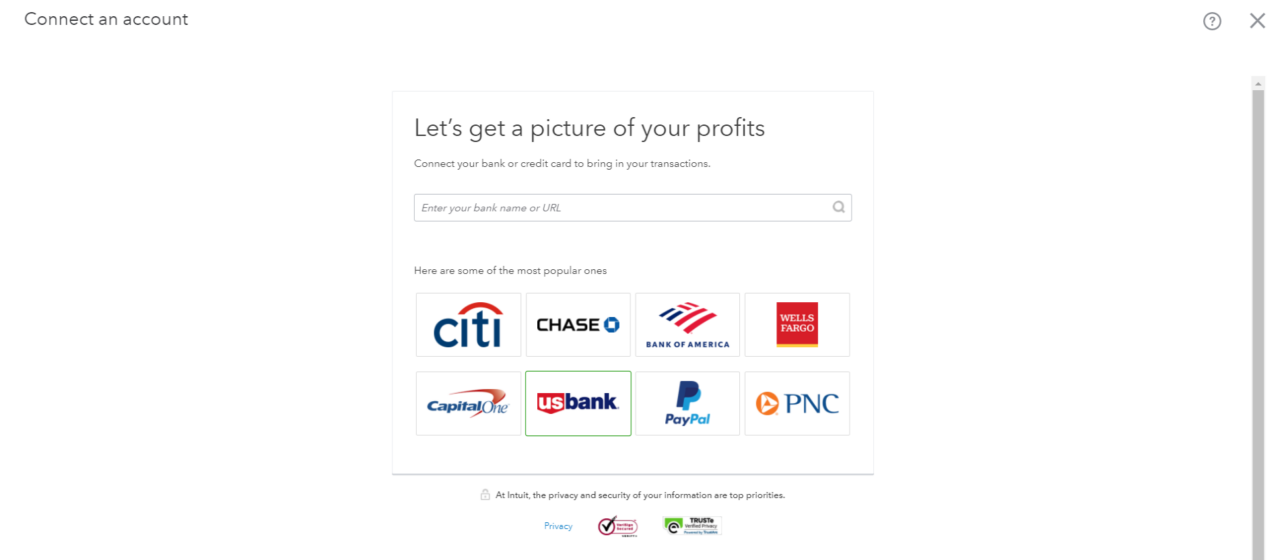
This will open a page allowing you to search for your bank from a list of banks offering direct links to QuickBooks Online.
If your bank is not displayed on one one of the tiles with icons, use the search box to find and select your bank.
If your bank is not listed, you will need to import your banking transactions using the CSV file import process (which is detailed in the second part of this article).
If you have already linked a bank account, you will be presented with the Banking Center dashboard. To add another linked account, press the ‘Link Account’ button at the top right corner of the page.

Step 2: Log Into Your Online Bank Account
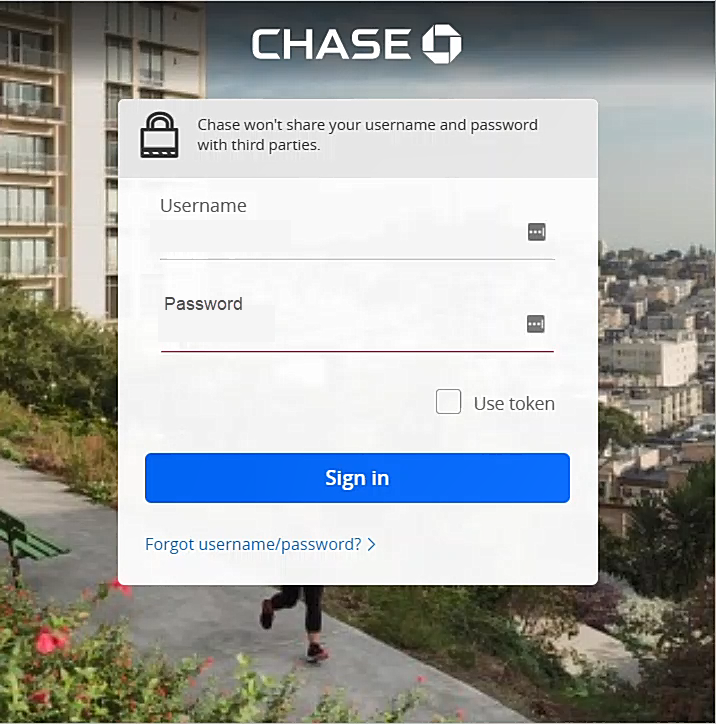
After selecting your bank, you will be presented a form allowing you to log into your bank account. You will need to enter the online banking user ID and password used for the selected bank account. Do not enter your QuickBooks Online credentials.
Once successfully logged in your online account with your bank, you will be shown all the accounts which can be linked to QuickBooks Online.
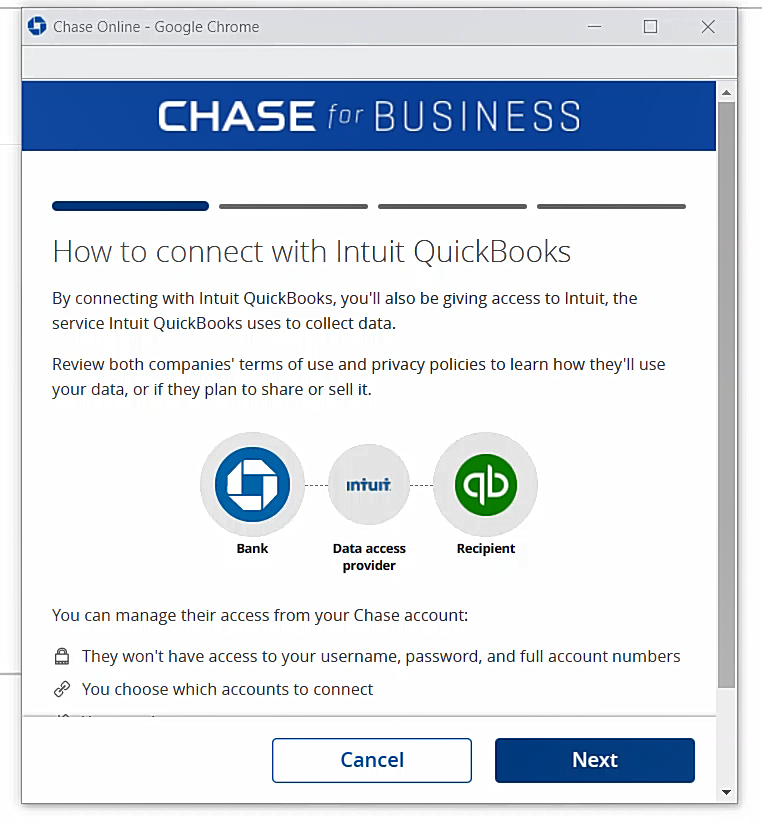
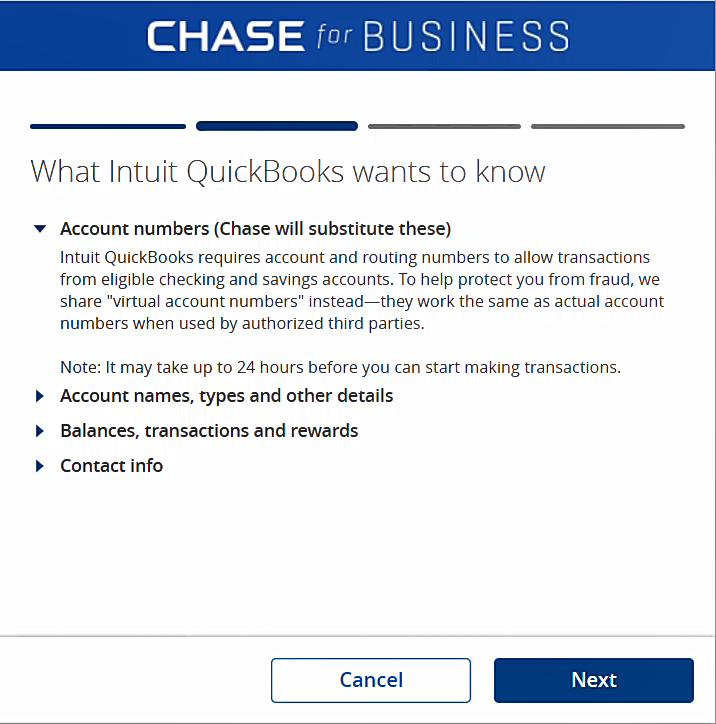
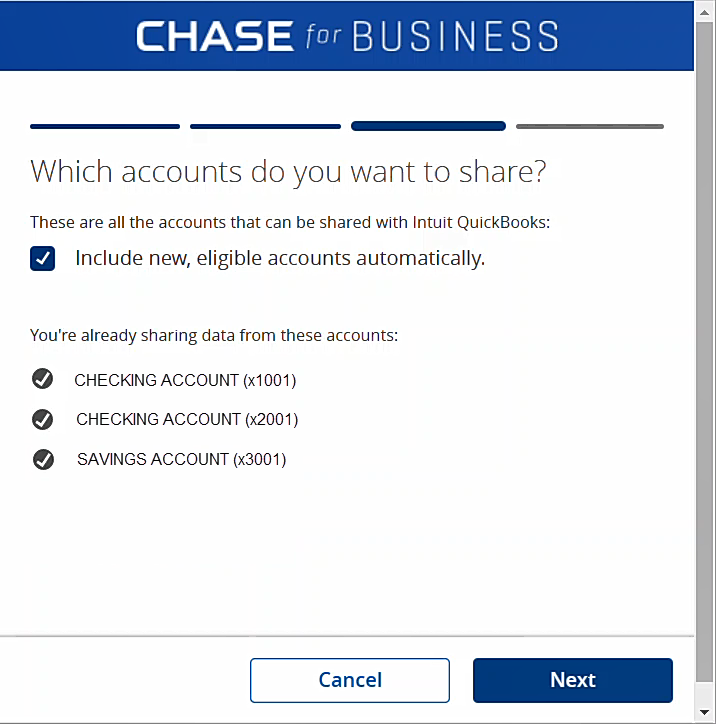
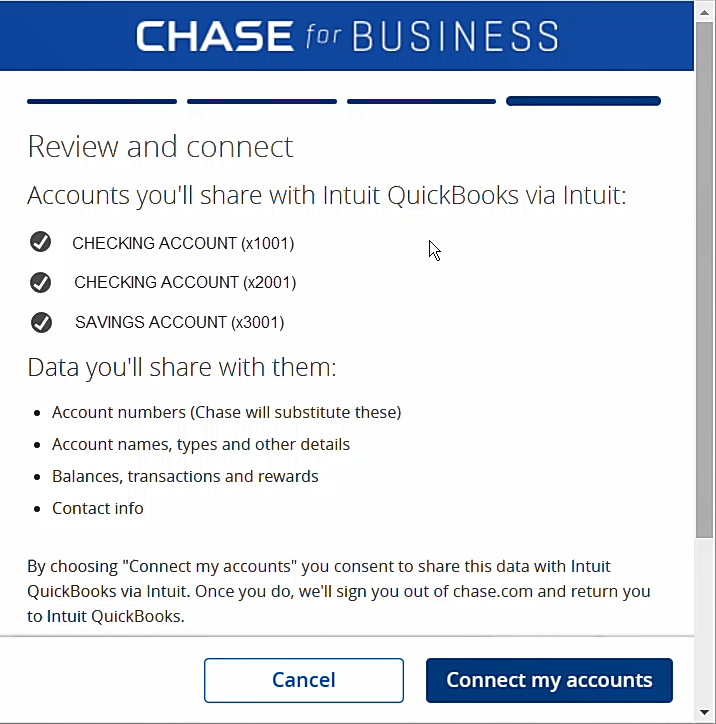
In this article, we are showing the account connection screens for Chase Bank. The connection screens for your bank may be slightly different and have different terms and conditions.
After reviewing the terms and conditions, press the blue ‘Connect my Accounts’ button at the bottom of the final screen shown below.
Step 3: Select Account(s) to Connect with QuickBooks Online
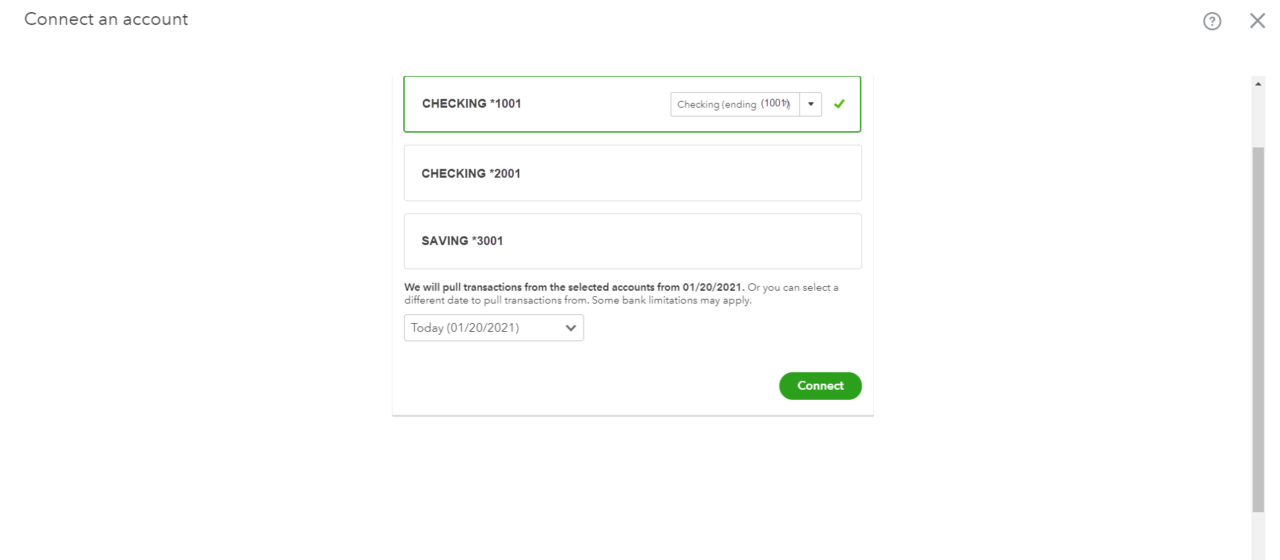
Once you have authorize QuickBooks to connect with your eligible online bank accounts, you will need to select which account will be linked with QuickBooks Online through this process.
QuickBooks will present a list of available accounts which can be linked.
To select an account, click on the tile of the desired account. The tile will become outlined and marked with a checkmark.
Important: The selected bank account will display a dropdown showing which GL accounts in QuickBooks the bank account can be linked to. Be sure to select the correct GL account for the link.
Use the drop down at the bottom to select the date range of data to be imported in the initial sync.
Note: The limit on initial import of historical transaction on the initial sync may differ by bank. With Chase, the data range is limited to 12 months. If you are seeking to import a date range greater than that allowed by the direct bank connection, you may be able to import a longer range of data by using the CSV file import process (see below).
Step 4: Authorize Connection with QuickBooks Online
Once you have saved the settings in the Account Configuration form, press the ‘Connect’ button and QuickBooks will start the sync process and download the transactions in the selected date range to QuickBooks.
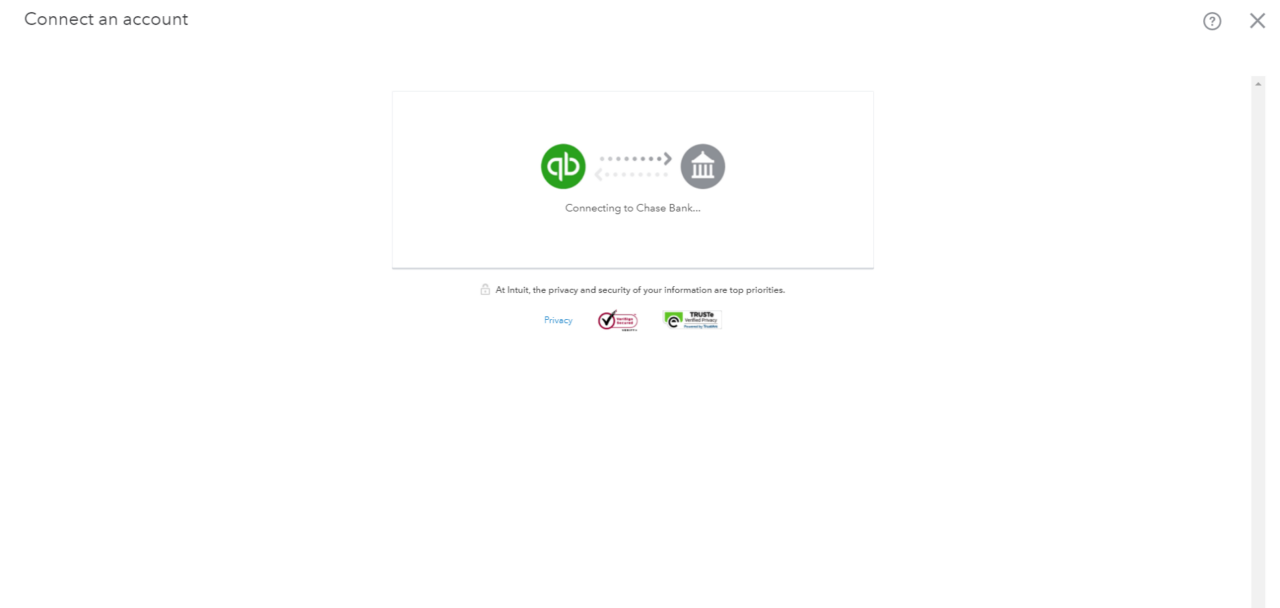
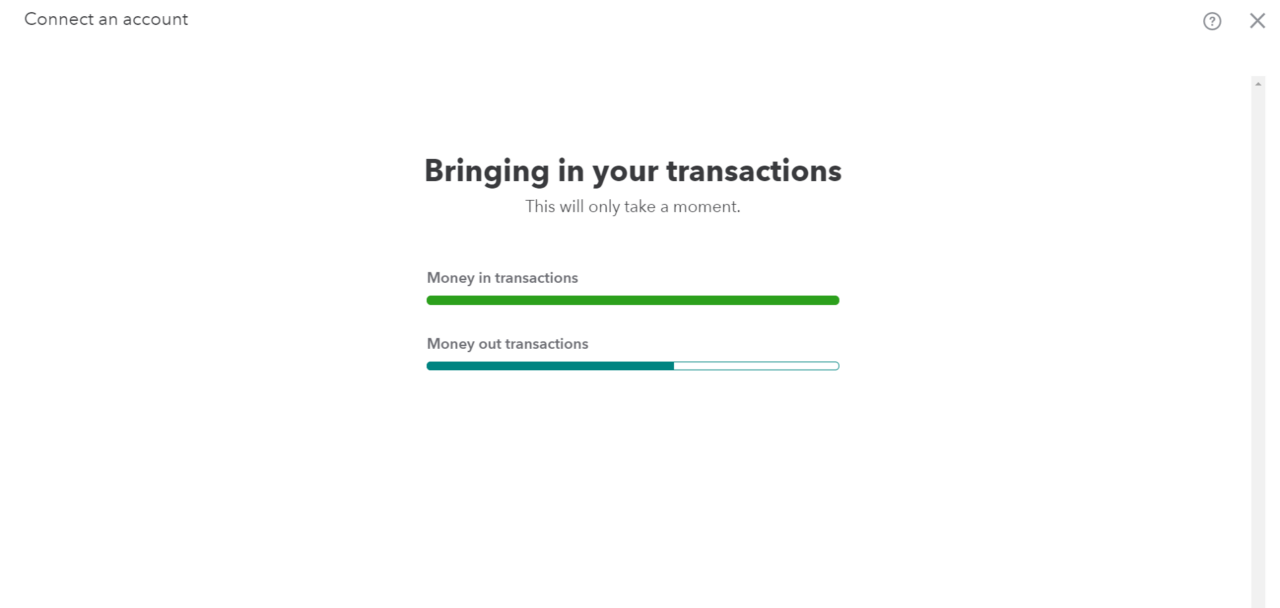
Depending on the date range, number of transactions and number of accounts, it could several seconds for the sync to complete. Once the sync has started, the following screens will be displayed:
Step 5: Configure the Bank Account Linked with QuickBooks Online
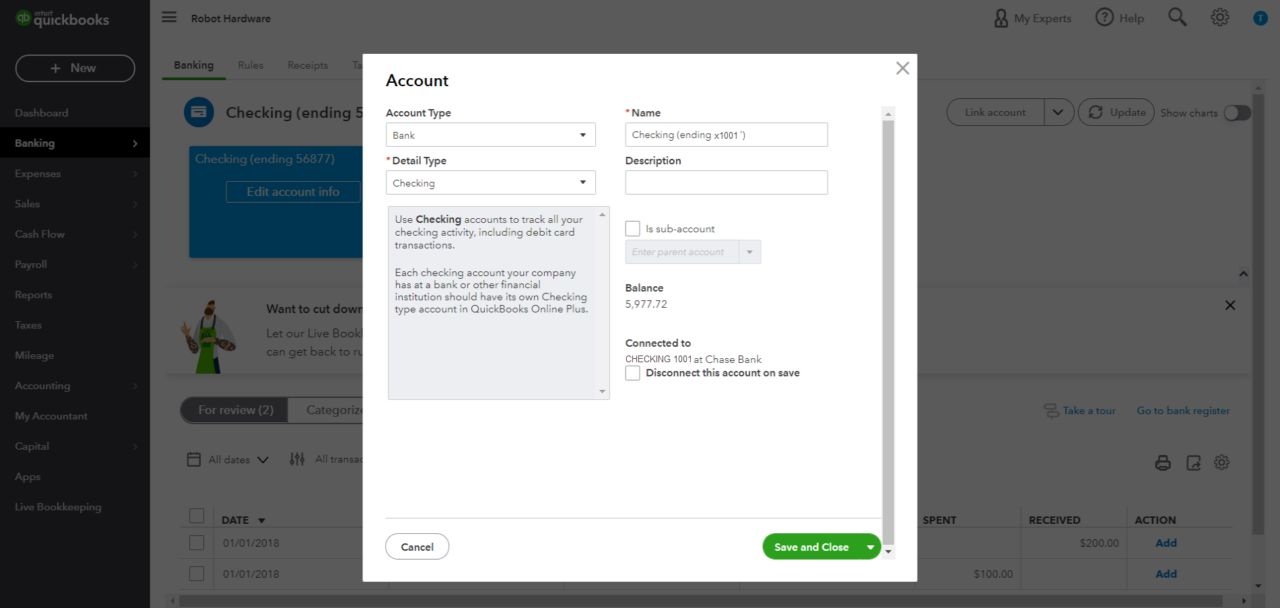
The next step is to configure the account selected. You will be presented with a screen that will allow you to set-up the selected account using the following options:
A. Account Type: Select the type of account that will be linked to QuickBooks Online. Options consist of banking and credit card accounts.
B. Detail Type: This fields allows you to select the type of banking or credit card account. Options for bank accounts include checking and saving accounts. In the gray box, QuickBooks Online presents more detail on the type of account selected.
C. Name: The name entered in this field will be used as a label throughout QuickBooks.
Tip: If you have multiple checking or savings accounts, append the name label with the last 4 digits of the account number (i.e. Chase Checking, x1001). This will allow you to easily tell one bank account from another and reference back to your bank statements.
D. Description: This optional field allows you to add an additional short description of the account or banking institution.
E. Is this a Sub-Account?: This allows you to designate the selected bank account as a sub-account of another account.
Tip: Before you click the green Save and Close button, be sure to double check that you selected the correct bank accounts and QuickBooks GL accounts to link. Unfortunately there is no ‘undo’ button – so you will need to manually delete any transactions erroneously synced. Its easy to accidently map the wrong accounts, so its worth an extra few seconds to double check everything.
Once you are satisfied with your configuration selections, press the Save and Close button.
Step 6 – Accept Transactions in QuickBooks Online Banking Center
The sync process will place the transactions in the Online Banking Center, but will not automatically accept the transactions.
Instead, all transactions that are downloaded will appear on the ‘For Review’ table view at the bottom of the Banking Center page.
The transactions will not be reflected in the various GL accounts until they are approved.
So, the final step to adding the imported transactions to your GL accounts is to accept the transactions in the QuickBooks Banking Center – just as you would need to accept any other transactions. Go ahead and review and the accept the valid transactions.
You are done!
Want to Link Another Account? To add another account, you will need to repeat the process – so go back to Step 1 of this article above.
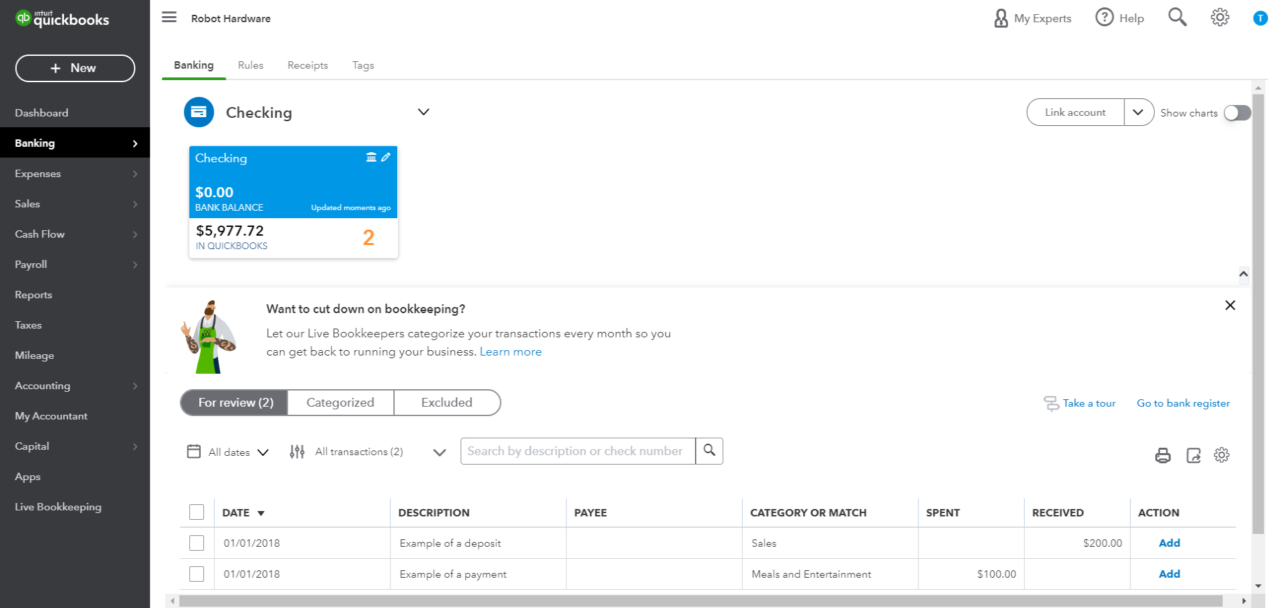
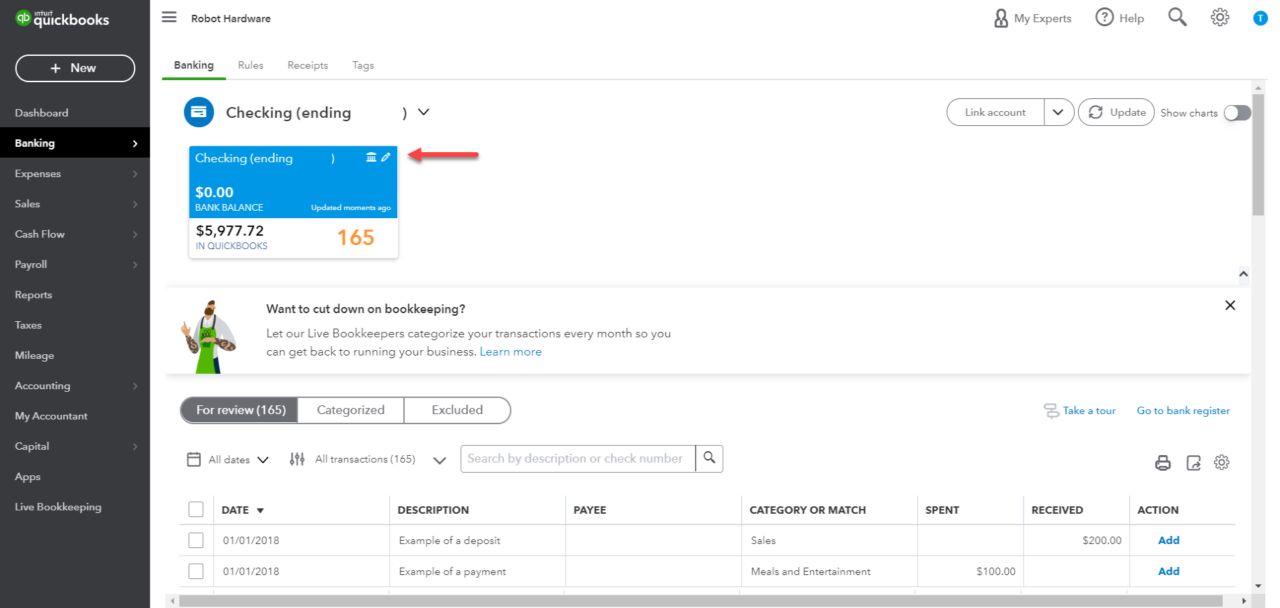
Want to Disconnect an Account? A linked account can be disconnected from the accounts configuration screen. To disconnect an account, follow the steps below:
- From the Banking Center, click on the edit icon (pencil) displays on the blue account box for the account that you wish to disconnect.
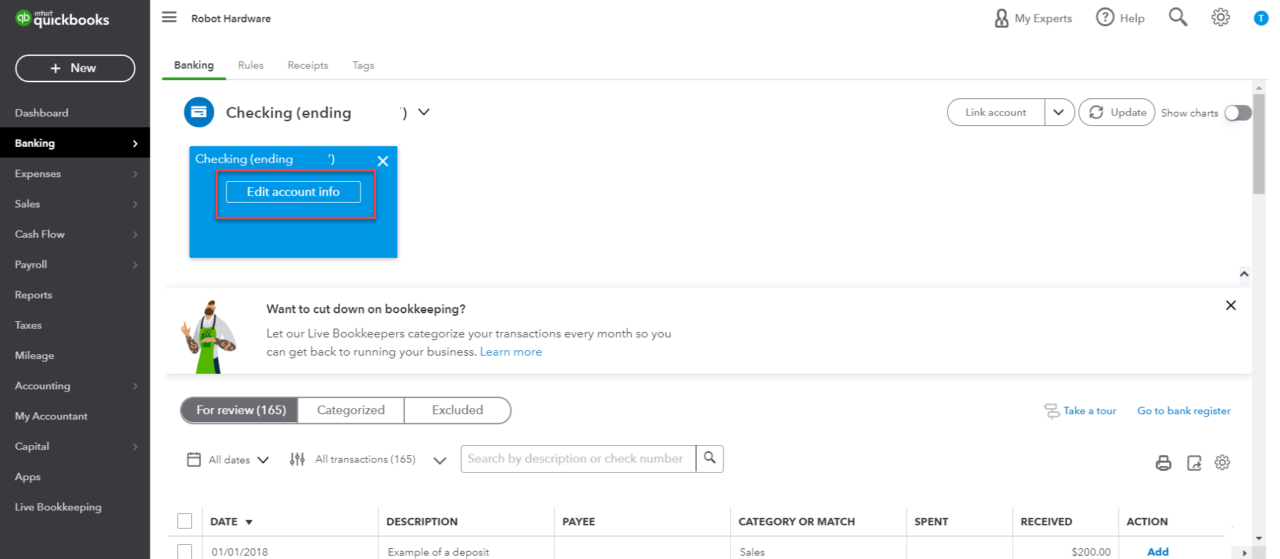
- Click the blue ‘Edit Account’ button that is presented.
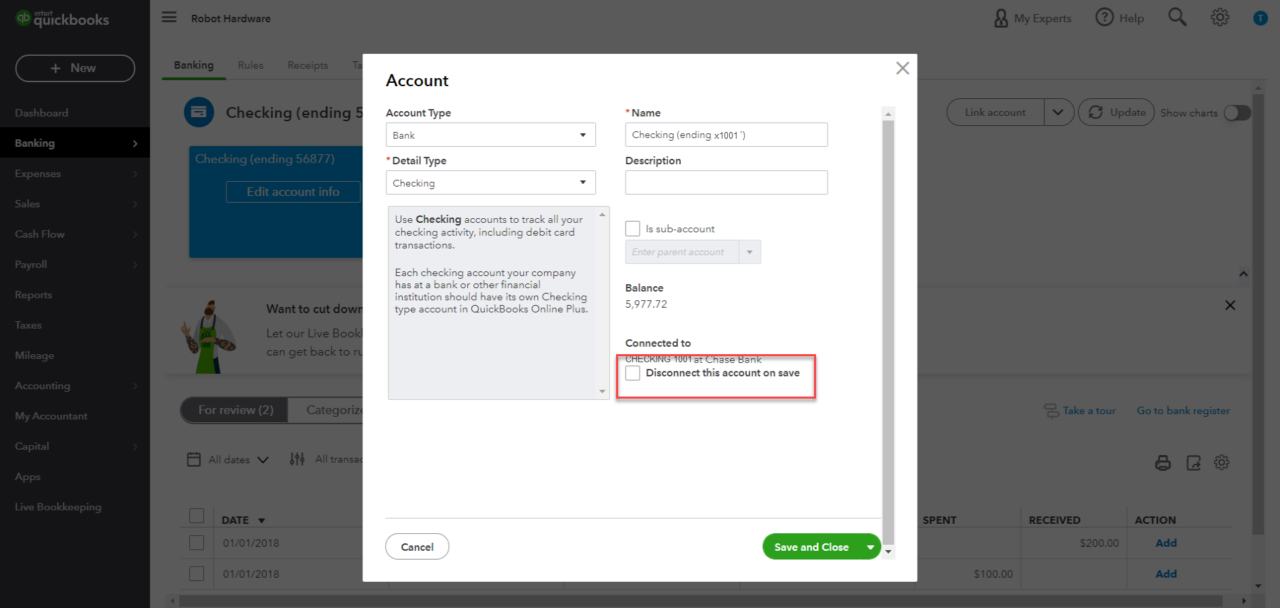
- At the lower right of the Account Configuration form, check the ‘Disconnect Account’ checkbox and press the Save button.
This will deactivate the sync and disconnect the bank account from QuickBooks Online. You will need to manual delete any transactions erroneously downloaded.
Option Two: Manually Importing Banking Transactions Into QuickBooks
If Intuit does not support a direct connection with your bank or if you need to download more than 90 days of banking transactions, then you will need to to import your banking transactions manually using a CSV file. QuickBooks also supports several other file formats, including QFX, QBO, OFX or TXT formats. Please check with your bank to see which file formats are supported.
The steps below describe the process to upload a CSV file. The import of other file formats follow a similar workflow. We assume that you have been able to download your historical banking transactions to a supported file format from your online banking account. If you have any questions on how to download your banking transactions, please contact your bank.
Once you have downloaded a supported file containing your transactions, please follow the below steps:
Step 1 – Navigate to the QuickBooks Online Banking Center
From left navigation menu in QuickBooks, go to Transactions > Banking (or Banking > Banking depending on your version of QBO)
Use the split button at the top right corner of the page to select the ‘Upload From File’ option (note that this is the same button used to link to a bank account).
You will be presented with a page that will allow you to either upload a CSV file or link electronically with a bank account. Chose the option on the left – ‘Get info from your bank’
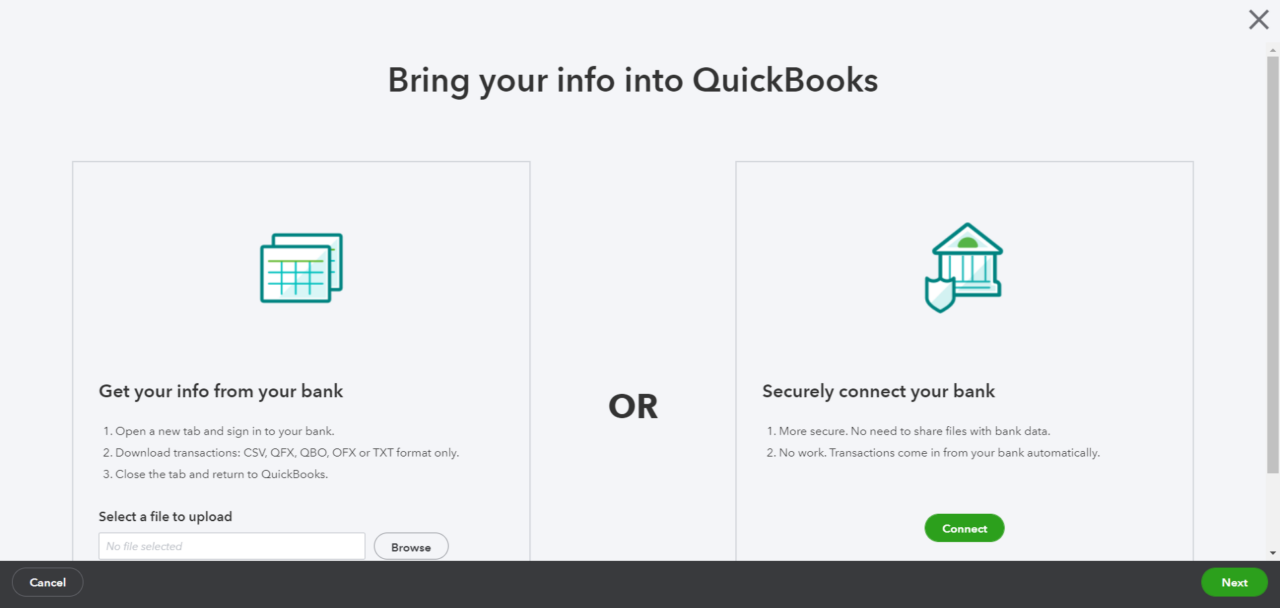
Step 2 – Select the File to Upload
Click the ‘Browse’ button, which will allow you to select a file to upload.
As noted above, transactions can be imported into QuickBooks Online using CSV, QFX, QBO, OFX or TXT file formats.
QuickBooks is very particular about the format of the CSV file imported. Unless the format of your bank’s export file conforms with the requirements of QuickBooks, you will receive an error message when uploading the CSV file. QuickBooks allows the following 3-column or 4-column formats. These are the only columns QuickBooks can handle and they must be in the order below.
The 3 column format includes columns for Date, Description and Amount.
| A | B | C | |
| 1 | Date | Description | Amount |
| 2 | 1/1/2021 | Payment example | -1000.00 |
| 3 | 1/1/2021 | Deposit example | 2000.00 |
The 4 column format includes columns for Date, Description, Credit and Debit.
| A | B | C | D | |
| 1 | Date | Description | Credit | Debit |
| 2 | 1/1/2021 | Payment example | 1000.00 | |
| 3 | 1/1/2021 | Deposit example | 2000.00 |
If you would like to add more transaction information, such as category or payee, you can add this information into QuickBooks Online transactions after the import.
Troubleshooting: If you receive an error message, check the following rules:
- 0’s are not allowed anywhere in the file ($0 should be left blank)
- $ symbols are not allowed ($100 should be 100)
- Commas for thousands are not allowed (1,000 should be 1000)
- Other special characters such as #, %, and & are not allowed
- Correct any transactions with the amount showing in the description column
- Remove the word “amount” if it appears in the credit or debit column, i.e. credit amount, debit amount
- Correct and standardize the date format to a single format i.e. dd/mm/yyyy
- MAC users must save the file as a Windows CSV file
Step 3 – Select a QuickBooks GL Account to Receive Data
From the drop down menu, select the QuickBooks GL account that will receive the imported transactional data. This is typically the bank account matching the account used to download the transaction data.
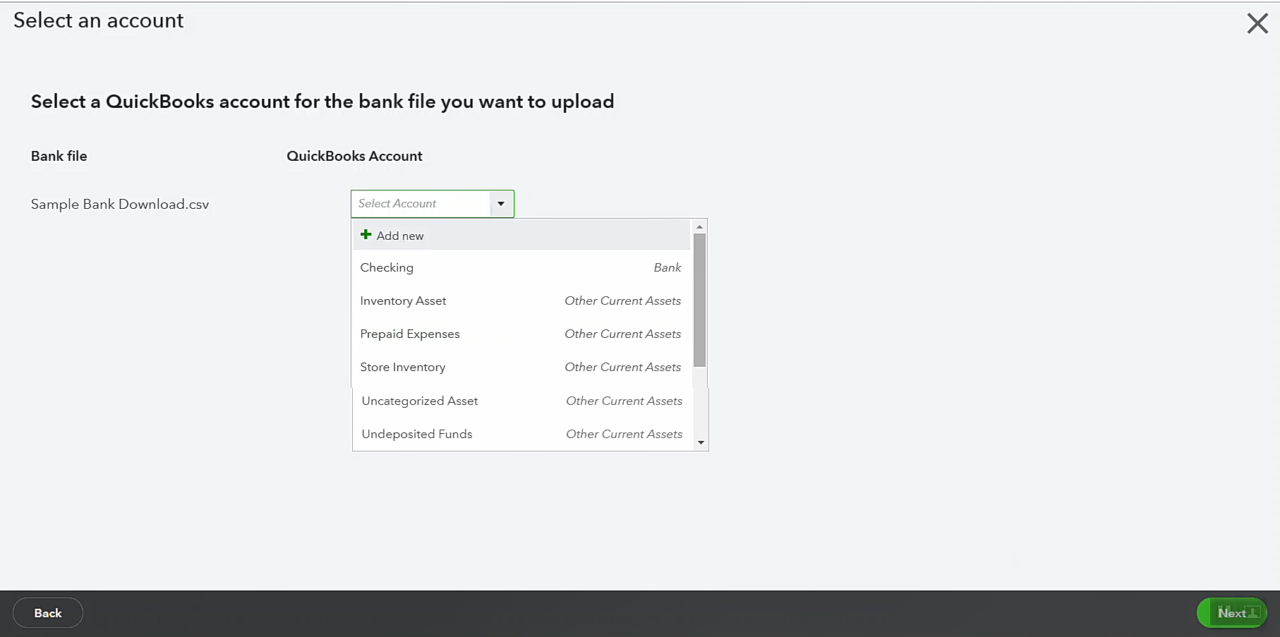
Account Not Shown? The top of the dropdown menu includes an ‘Add New’ option allowing you to create a new GL account in QuickBooks. Selecting the ‘Add New’ from the top of the drop down menu will present a pop-up allowing you to create a new GL account to accept the transaction upload.
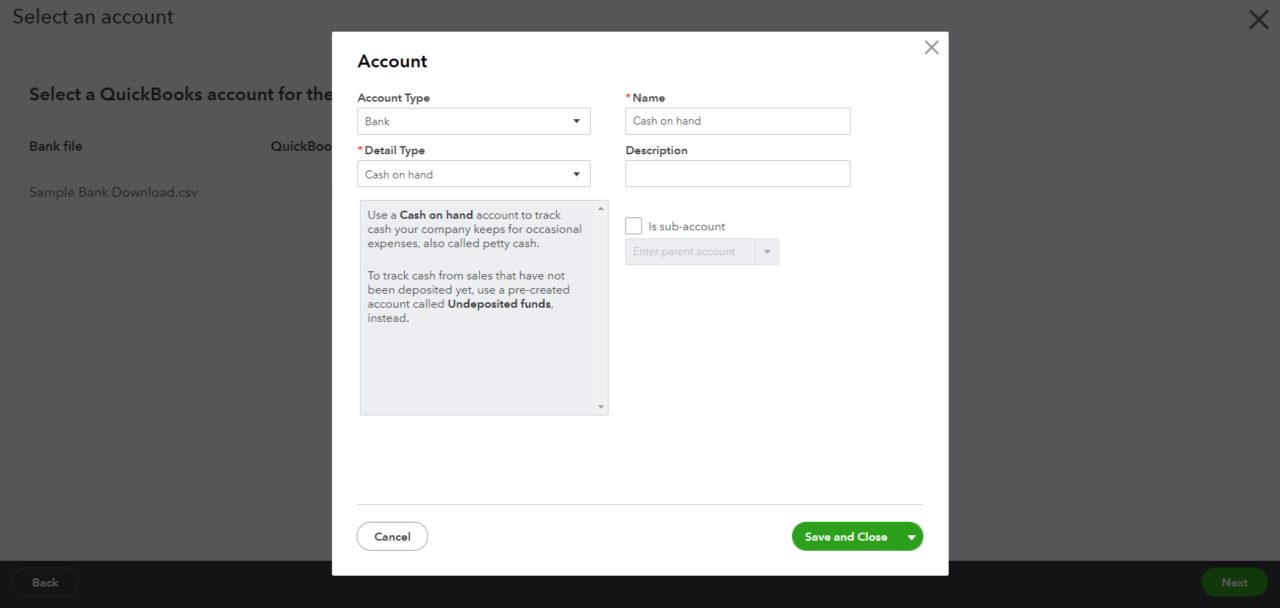
Step 4 – Map Export File Fields to Your QuickBooks Online Fields
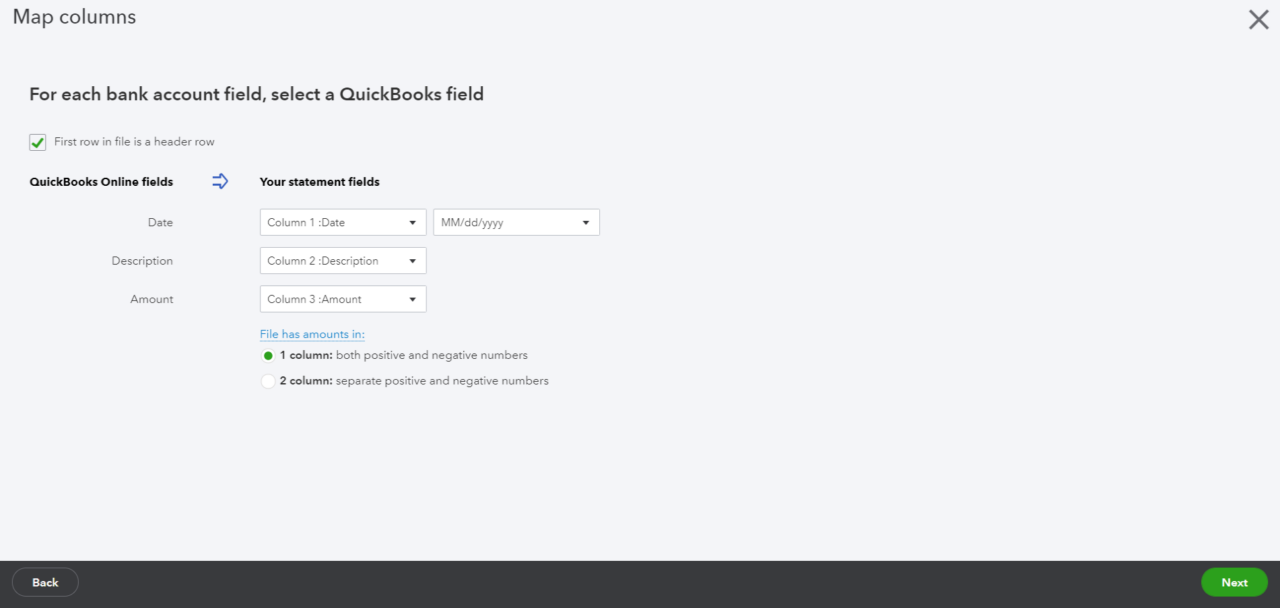
The next screen allows you to map the fields in your upload file to the corresponding fields in QuickBooks Online.
- If your CSV file has a header row, make sure to check the box at the top left of the screen
- The first mapping links the date field in QBO to the column in your CSV file containing the transaction dates. Use the second dropdown to select the format of the date column.
- The second mapping links the transaction description field in QBO to the column in your CSV file containing the description of the transaction.
- The third mapping links the transaction amount field in QBO to the column in your CSV file containing the transaction amount.
- There is an additional control allowing you to select between a 3 column format (i.e. single amount column with both positive and negative numbers) or a 4 column format (i.e. positive and negative amounts are separated into two columns).
- If you select the 4 column format, you will be able to choose the column that has the positive numbers (debit) and the column that has the negative numbers (credit).
Step 5 – Select Banking Transactions to Import
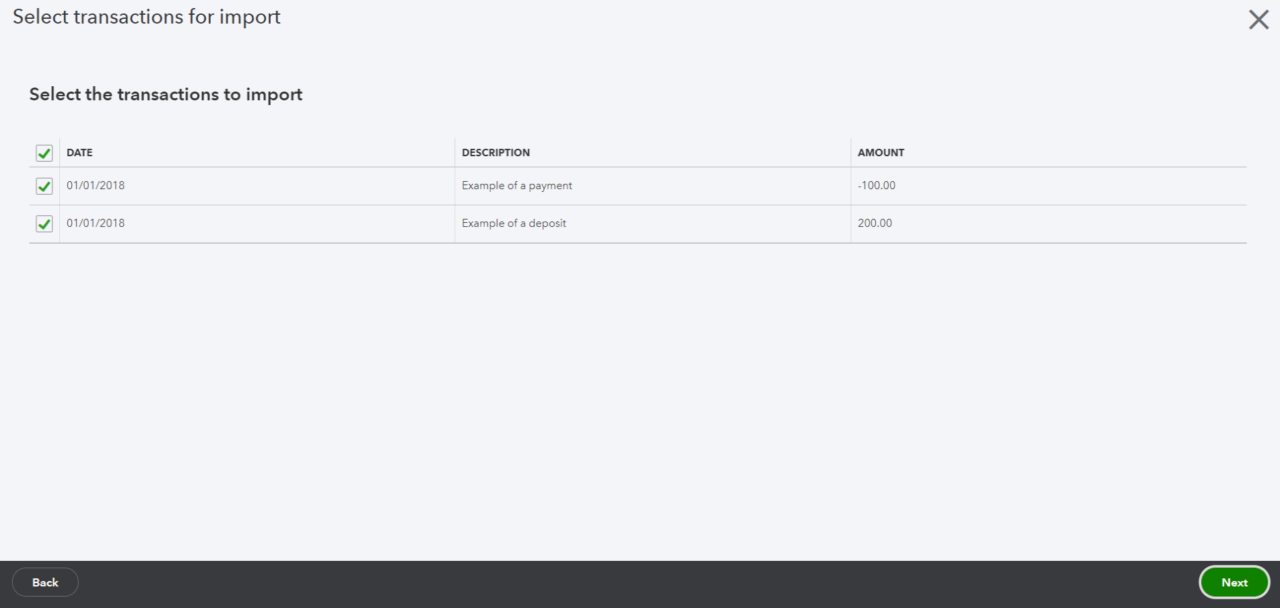
The next step is to select the transactions to be imported into QuickBooks from your import file. You will be presented with a list of all transactions in your import file. To include a transaction in the import, select the checkbox in the first column. You can bulk select all transactions in the table by checking the box in the header row to the right of Date title.
Step 6 – Confirm Transactions to Import
The next step is to confirm or accept the transactions that you have selected to upload to the designated account.
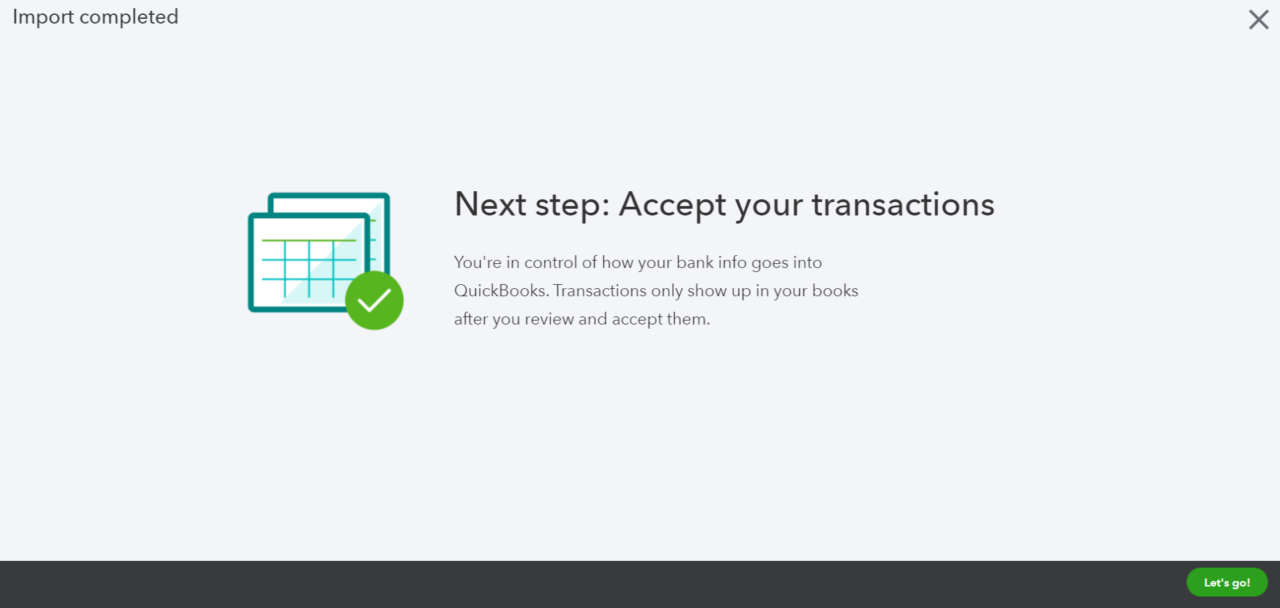
Once you have confirmed the import of the transactions, you will see the following screen confirming that the transactions have been successfully imported:
Step 7 – Accept Transactions in QuickBooks Banking Center
The final step to adding the imported transactions to your GL accounts is to accept the transactions In the QuickBooks Banking Center – just as you would need to accept any other transactions.
All transactions that are downloaded will appear on the ‘For Review’ table at the bottom of the Banking Center page.
